Eliminate Shock Fade with Automotive Heat Shield Insulation
Let’s face it, heat can really put a damper on your fun. You’re riding hard in your Polaris RZR only to have the right rear shock start to get a little spongy. The culprit? Heat from the exhaust cooking the oil in your shock. Too much heat in the shock and the oil aerates meaning you’re no longer getting the dampening effect as designed.
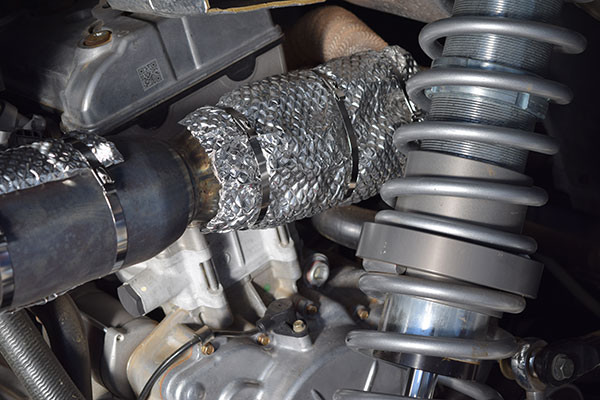
At Heatshield Products, we’ve developed the DIY Polaris RZR heat shield — the Heatshield Armor UTV Kit — to fix the hot shock and hot airbox/plenum problem that can affect some RZRs. It’s an easy-to-use UTV heat shield, plus Heatshield Armor will stop more heat than an exhaust wrap.
Near the end of this installation video, you can see we measured the outside of our automotive heat shield insulation wrap at 500° Fahrenheit — that’s compared with the outside temperature of the Heatshield Armor which is only 100° Fahrenheit. Shock oil can start breaking down if it exceeds 350° Fahrenheit.
Here is a quick overview of how to install our Heatshield Armor UTV Kit. For safety, we always recommend wearing gloves, safety goggles, and a dust mask.
How to Install UTV Automotive Heat Shield Insulation
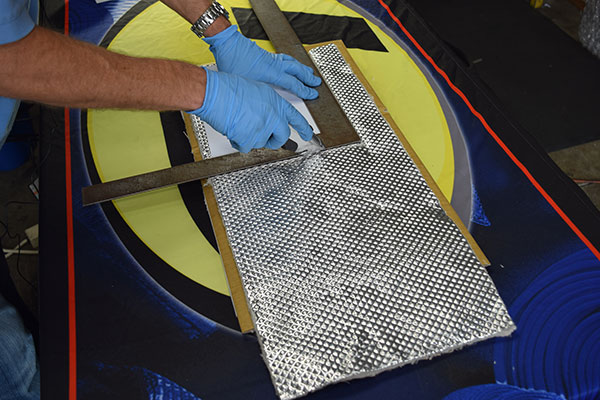
Measure twice, cut one. We strongly recommend making a template for your DIY Polaris RZR heat shield. In this case, we used some heavy card stock paper and cut it to fit. For our template, we made it ¼ inch wider than we actually wanted it on all four sides — you will see why in a minute. Transfer your template onto the Heatshield Armor, and cut the automotive heat shield insulation with a pair of heavy-duty scissors or a utility knife. Using a straight edge helps.
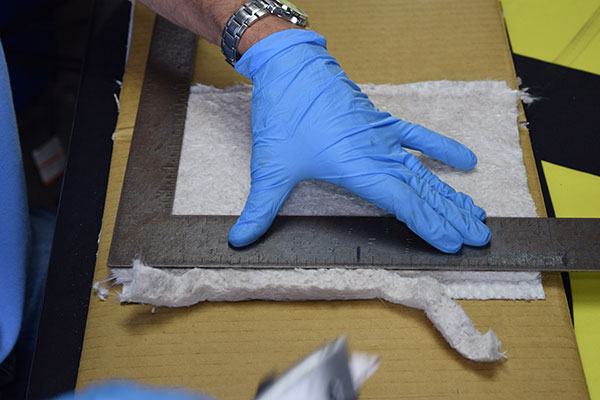
This is the cool part: Starting a 1/4 inch or 3/16 inch from the edge, use a utility knife to trim the insulation only; do not trim the aluminum. Trim back the insulation all the way around the edge. Now peel the trimmed insulation from the edges. Carefully fold the aluminum layer over to cover the edge of the insulation. This protects the edge of the automotive heat shield insulation around the perimeter and gives it a nice, finished look.
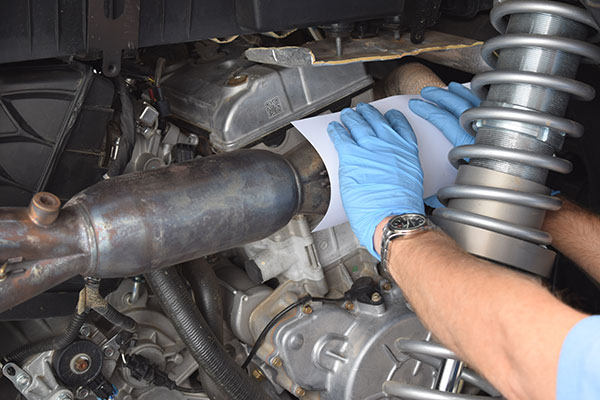
Pre-fit the Heatshield Armor onto the exhaust pipe. If it fits well and looks good, then it’s time to install it!
If you are working by yourself, our pro tip is to pre-install one of the included Thermal-Ties. Barely get the tail through the head of the tie leave it hanging on the exhaust pipe. Slide the Heatshield Armor between one of the Thermal-Tie and the exhaust pipe, and tighten the tie by hand. Use the other two Thermal-Ties to secure to the UTV heat shield to the pipe.
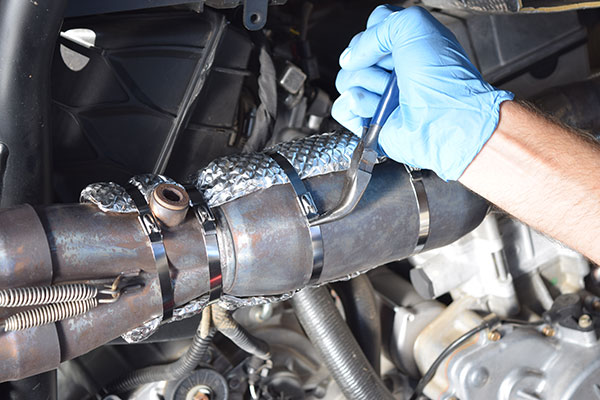
Give each of the Thermal-Ties a good final pull by hand. Trim most of the excess tie but leave yourself about 1/2 inch to 3/4 inch. Using a pair of needle-nose pliers, grab the tab and twist once back into the tie, and then twist back into the tie a second time. Repeat the process for the remaining two Thermal-Ties.
In addition to controlling more heat, this DIY Polaris RZR heat shield is more rugged than exhaust wrap. Therefore, when you’re riding on a trail or in the desert, you don’t have to worry about the brush catching and snagging like you would with exhaust wrap. Another great benefit is that the Heatshield Armor won’t get brittle and fall off like some automotive heat shield insulations do over time.
Plan on getting your vehicle wet? That’s not a problem! The aluminum armor layer rejects fluids. You can even briefly hit it with a pressure washer and it won’t fall apart. So go ahead—get yourself a Heatshield Armor UTV Kits and make your next ride a more enjoyable one!
If you found this information useful, we encourage you to share with your friends and online communities. Tell us what you will use Heatshield Armor on in the comments below!